


Check out the best performance and controller settings for NetEase's Hyper Force, a game some have dubbed a Valorant clone.

Hyper Front is that mobile tactical shooter that came out of China that many branded an outright rip-off of Valorant - but you already knew that, didn't you.
That game got its global release this week with the launch of Season 1: Outbreak, and what you have discovered is that not only is Hyper Front a Valorant Mobile rip-off, but until the latter comes out, it scratches that tac-shooter itch just the same.
So, now you need the best settings because your smartphone is running hot, and you have finally gotten rid of the bot games, and that look sensitivity is driving you crazy. You need max frames-per-second (FPS) and the best crosshair, and you need them now.
That is where our Hyper Front settings guide comes in, showing you how to get those sweet-sweet frames and get you dinking heads like you were on your big boi gaming machine.
Hyper Front - Betting Settings Guide
Hyper Front gives you a pretty extensive range of options that allow you to customize the control, screen, and graphic settings.
To change your Hyper Force settings, you will need to click the button found at the top right of the main menu (shaped like a bolt), then press "settings," which can now be found at the bottom right of the screen.
Below we offer the best settings - at least we can find. Because there is an element of trial and error here, especially when it comes to your desired control/screen setup; how big your hands are, your screen is, or how many fingers you can use comfortably are all just some of the factors you will have to consider when adapting those particular settings.
And when it comes to graphic/performance settings; for full disclosure, the following guide was the result of playing Hyper Front on a OnePlus 7T Pro, which has a 6.67" 90 Hz display, a Qualcomm Snapdragon 855 Plus, and 8 GB RAM. A great device in its day but a couple of years old now and far from the most powerful on the market.
Enough said, let's get into the best settings.
Best Graphic/Performance Settings For Hyper Front
Let's start with getting those frames as high as possible while not giving up any disadvantages due to poor graphics.
The game defaulted to the "Ultra" preset, and we played a number of games with that before subsequently dropping to "High" with the in-game FPS set to "Standard".
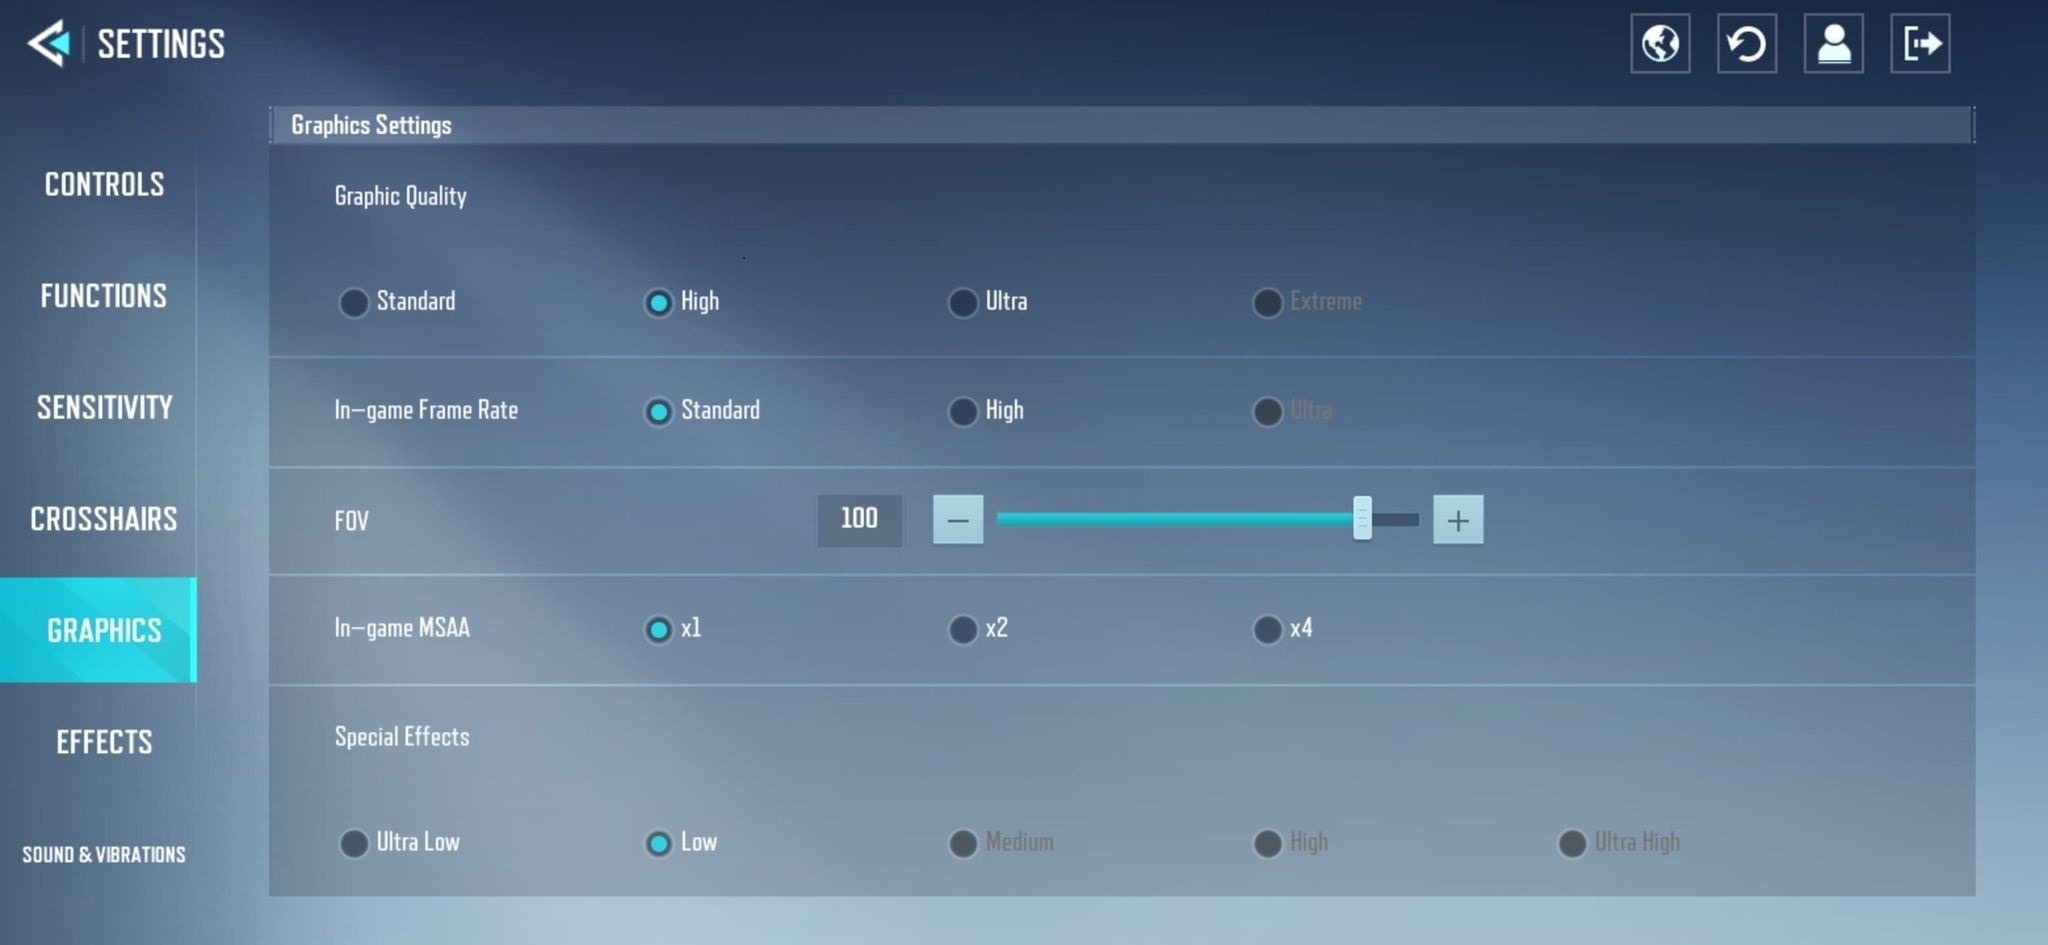
We also turned down the MSAA to the lowest setting of "x1" and turned bloom to "off".
This not only proved an increase in FPS but also in visibility, with objects, characters, and walls all appearing more exact with these graphic settings.
Unfortunately, Hyper Front doesn't have an in-game FPS counter so you will have to do the tweaking here with nothing more than how the game "feels" but, having said that, the game performs well with little noticeable drops in frames even with the higher settings.
Best Control Settings For Hyper Front
Getting your control and screen settings right for Hyper Front is perhaps the most difficult task and one that will also involve an element of trial and error - it just so happens that your errors will be at clutch moments and when you suddenly realise your non-ADS sensitivity is way too low.
There is also the screen layout, with the three character abilities, three movement types (crouch, walk, jump), and three weapons, there is plenty to map.
Then there is how you want to set up firing and moving. Tap, toggle, right, left, there are plenty of options and it can prove pretty daunting.
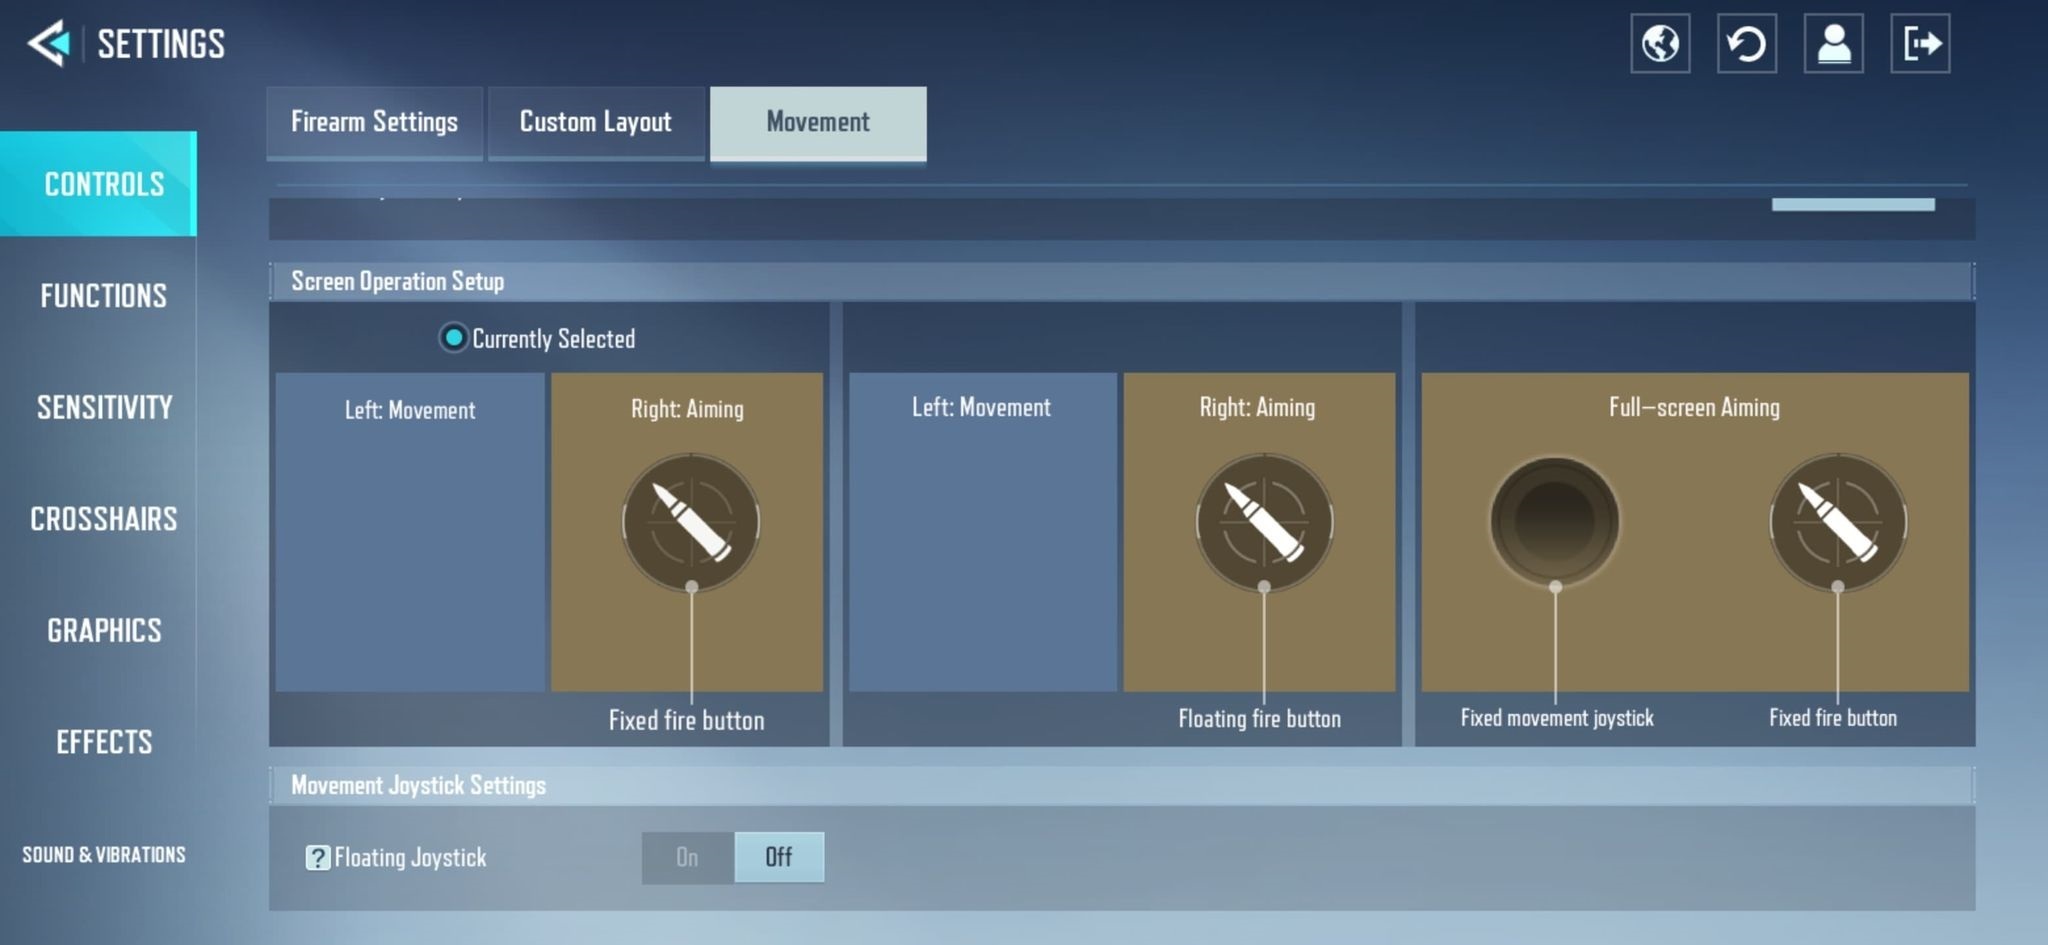
So, to help out, here are the best controller and screen settings we could put together, coupled with our reasoning when it feels necessary to explain our decision.
Firing mode (SMG, AR, MG)
- Right-side Fire Button: Rotation
- Left-Side Fire Button: N/A
Firing Mode (Secondary Attack, Shotgun, Sniper Rifle)
- Secondary Attack Mode: Tap to fire
- Shotgun Firing Mode: Tap to fire
- Bolt-Action Rifle Firing Mode: Tap to ADS, release to fire
ADS Button Settings
- ADS Mode: Toggle ADS
Reload Settings
- Reloading will not interrupt ADS: Off
- Magazine capacity depletion plan: Auto Reload
Aim Assist Settings
- Firearm Aim Assist: On
- Melee Aim Assist: On
These settings are all default, and we suggest sticking to them from the outset until you find reason to change them. So far, we haven't found a reason.
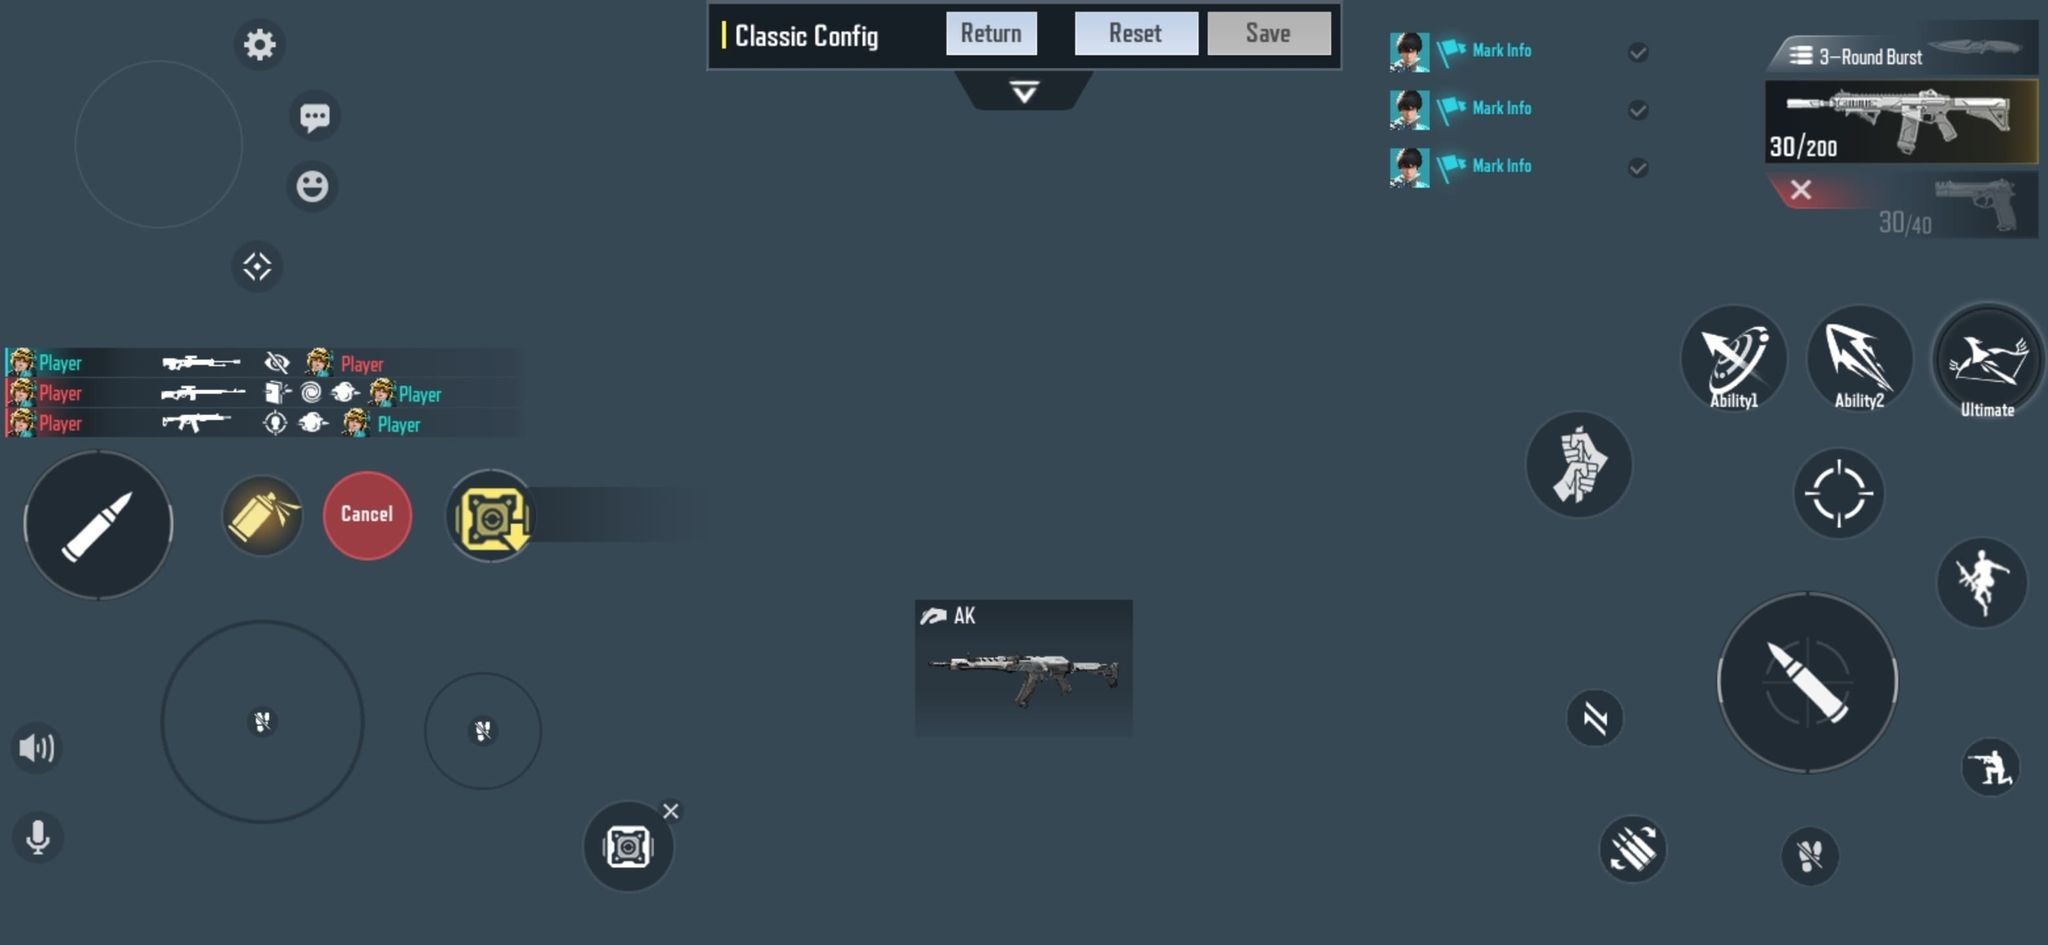
Custom Layout
That isn't the case with the screen layout though.
We initially used the Classic Config learning that we wanted something a bit different.
With some changes that incorporate elements of the Tiling Config, namely the moving of the weapon selection wheel to the top right, while also resizing and moving some buttons, we found we had a less complicated screen which felt closer to the keyboard and mouse experience.
Sensitivity
The next important aspect is your sensitivity. Again this will have an element of trial and error based on screen size and how you setup the virtual joysticks etc., but for us, the default non-ADS sensitivity, in particular, was too low.
To start with, Overall Sensitivity is set to Medium with Camera Rotation Speed set to Accelerate with Distance.
Camera Sensitivity (The sensitivity of camera movement when swiped while not firing)
- Non-ADS Sensitivity: 240
- ADS Sensitivity: 150
- 2x Scope Sensitivity: 85
- 4x Scope Sensitivity: 45
These are all increased quite a bit from their default settings but should make looking around a much less arduous process.
Fire Sensitivity (The sensitivity of camera movement when firing)
- Non-ADS Sensitivity: 170
- ADS Sensitivity: 140
- 2x Scope Sensitivity: 85
- 4x Scope Sensitivity: 45
Increased again here, but this time, not by as much.
In terms of Gyroscopic controls, we have this turned off, so no adjustments needed here.
Best Crosshair Settings For Hyper Front
Now, when it comes to the best crosshair, we are taking heed of our design decisions when it came to the best control layout and trying to keep it small and compact.
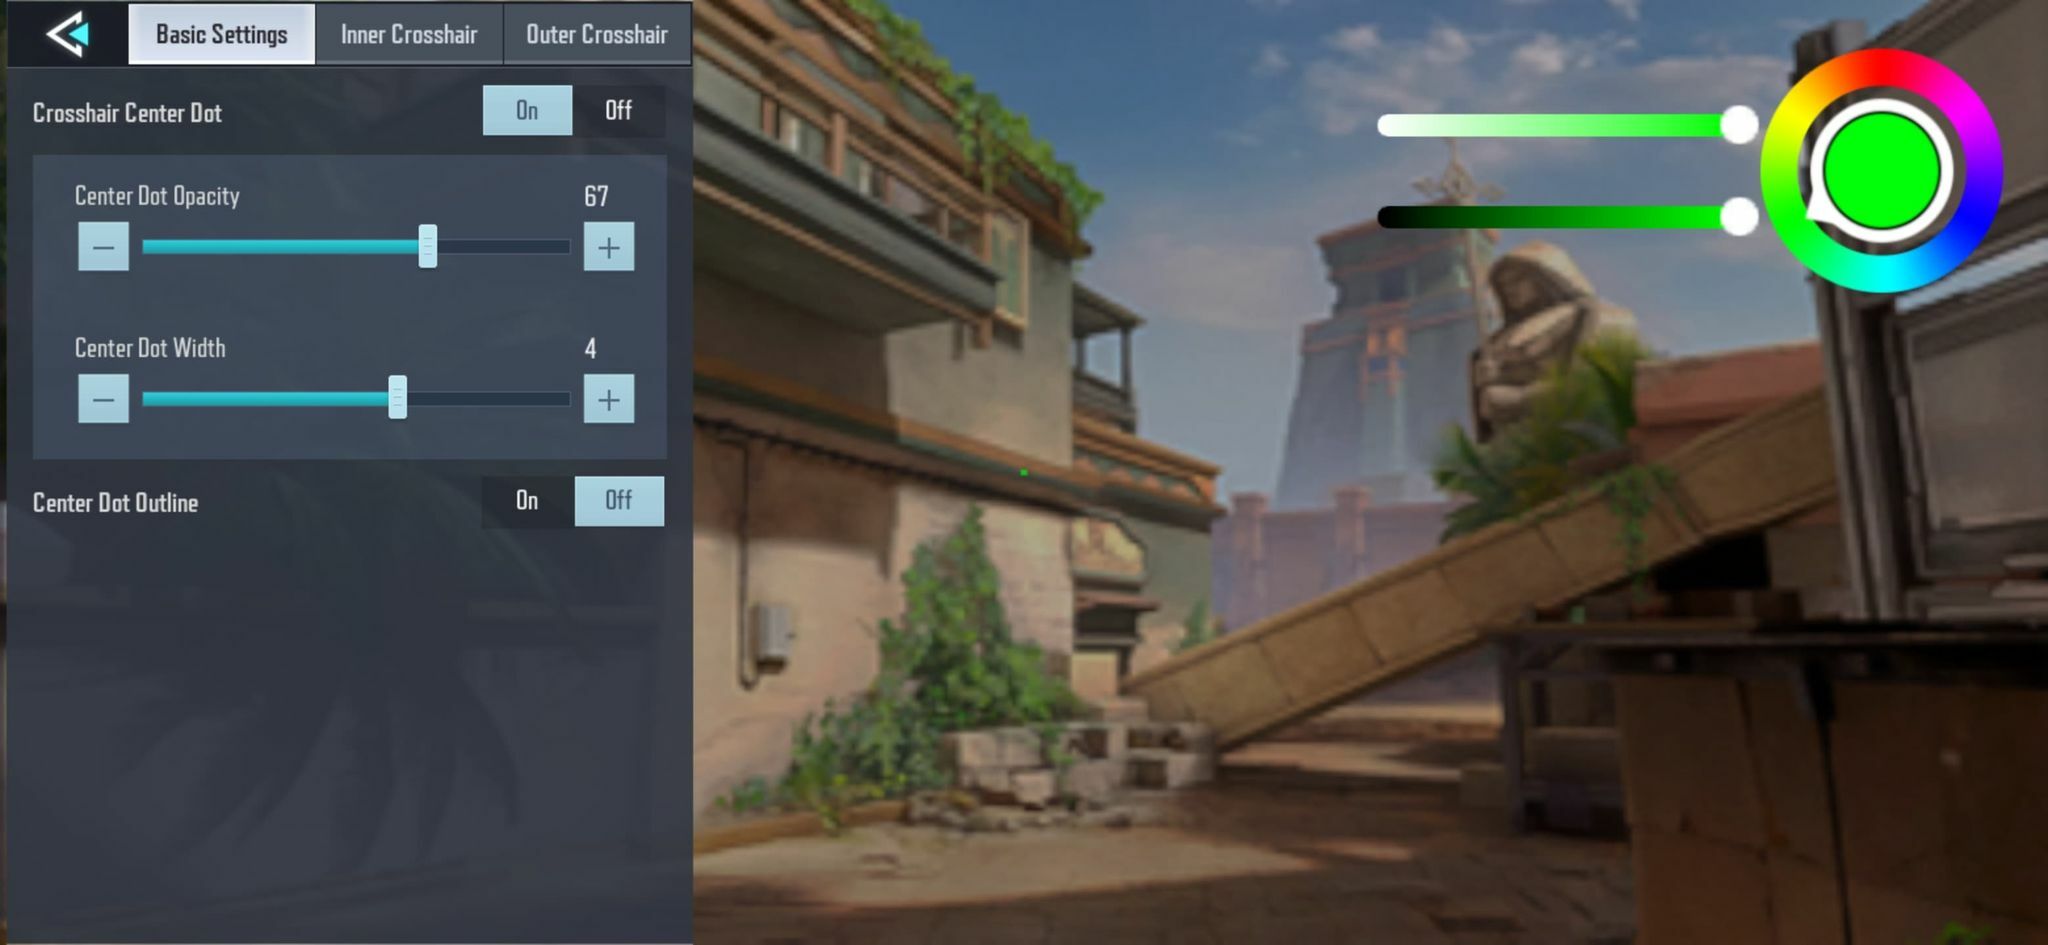
That's why we opt for the DMR crosshair setting, which is simply a little circle in the very center of the screen. It doesn't expand for recoil, it simply sits there - perfect for dialling in for those headshots.
We then customized it, opting to make it green and turn the opacity to 100 (which makes it less opaque).
That is it for our Hyper Front settings guide, there are a few other elements you can customize such as the audio and function settings but we have kept these to default and haven't found the need to change them. Though, if that changes, this page will be updated accordingly.
For more mobile gaming news and guides, check out: